





































Guide · Trading Cards · 9 minute read
How to Prepare Cards for Grading
Part 6 of 6 Grading Explained
Published
Sending a card to be graded means trusting it to the post and to a stranger's hands. How you prepare it decides how it travels. This guide shows how to sleeve, hold, stack and pack cards for a grading submission, step by step, and what to check with your grader first.
Before you begin
Every grading company publishes its own packing instructions, and they change from time to time. They always take priority over general advice, including this guide.
- Choose your grader and service level. Check the price, turnaround and any limits on value or card type for the service you want.
- Create your submission online first. Most graders want the order entered on their website before you post anything. It produces the packing slip or confirmation you'll put in the box, and sometimes a label for the outside.
- Read the packing instructions for that grader. Note what they ask for: holder type and size, how to bundle cards, and what to put inside and outside the box.
- Check any unusual cards. Thick relic or patch cards and oversized cards may need a different holder. ACE, for example, suggests a magnetic case for patch and thicker cards.
- Photograph each card, front and back, and keep a list in the same order as your submission form. It's your record of how each card left you.
New to grading? Start with What Card Grading Is and Who Grades, and see what each grade means in our PSA and TAG grade scales.
What you need
Most graders ask for the same basic set-up: each card in a clear soft sleeve, inside a semi-rigid holder. How the holders are bundled and posted varies more, so treat the rest of this list as typical rather than required.
Handling and sleeving your cards
A card is most at risk while it's out of any protection, so keep that time short and do it somewhere calm.
- Work on a clean, dry, flat surface with good light, away from drinks and anything that could fall on it. Wash and dry your hands.
- Use a new, clean, clear sleeve of the right size (standard cards take sleeves of about 66 × 91mm). Avoid coloured, matte or textured sleeves: the grader needs to see the card.
- Hold the card by its side edges, with your fingers off the face and back.
- Line the card up with the opening and slide it in bottom edge first, keeping it straight so the corners don't catch the sleeve.
- If it resists, stop. Take it out, line it up again and try once more. Never push.
Don't try to improve a card before grading. Cleaning, pressing, trimming or otherwise altering a card can damage it, and graders look for alteration. Beckett, for example, still charges for cards it doesn't grade because of evidence of tampering or restoration.
Using semi-rigid holders
A semi-rigid holder is a thin, slightly flexible plastic sleeve with a wide opening and a lip. Unlike a rigid toploader, the grader can slide the card out without forcing it. That's why graders ask for them:
- PSA asks for each sleeved card in a semi-rigid holder of 3 5/16 × 4 7/8 inches for standard cards, and says not to use toploaders.
- Beckett asks for oversized semi-rigid holders such as a Card Saver I.
- CGC asks for a semi-rigid sturdy enough for it to remove the card safely.
- ACE asks for a penny sleeve in a semi-rigid, one card per holder.
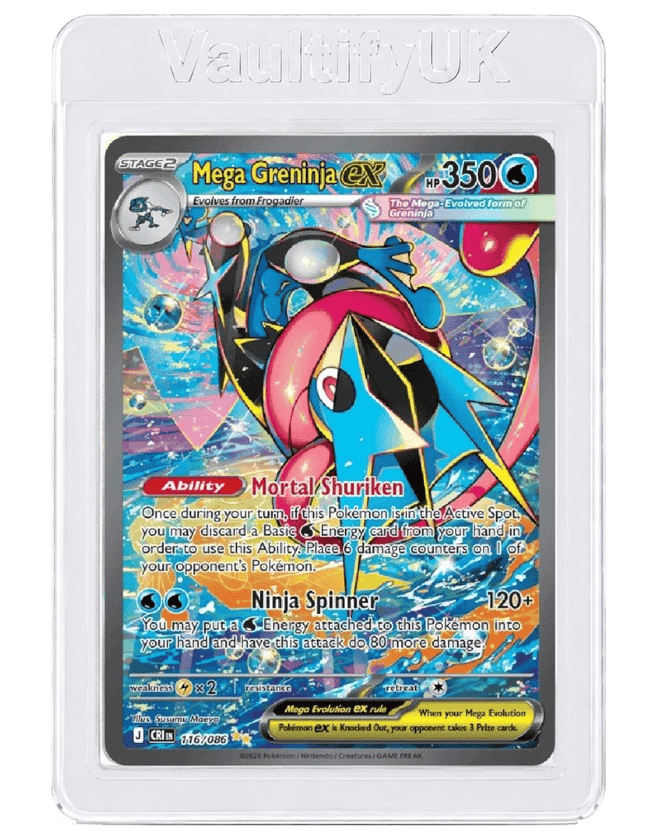
- Sleeve the card first, so the holder's edges slide against the sleeve, not the card.
- Hold the holder upright, opening at the top, and lower the sleeved card in straight.
- Use light pressure only. If it won't go in, the holder is the wrong size or the card is too thick: check it with our Card Thickness Gauge and your grader's advice for thick cards.
- One card per holder. ACE asks for it, and it keeps each card easy to remove.
For more on sleeve sizes and how semi-rigids differ from toploaders, see Sleeves, Toploaders and the Right Fit.
Preparing several cards
Protect each card on its own first, then group the cards. This is how our Shield Grading Submission Kit is packed:
- Put the holders in your submission order, with the first card on the form at the top.
- Face every card the same way, fronts up and tops at the same end.
-
Place each holder between two pieces of stiff cardboard that extend a little beyond the semi-rigid holder.
-
Hold each pair of boards together with two rubber bands, one near each end: snug enough that nothing slides out, never tight enough to bow the card. CGC asks for bands just tight enough to hold the cardboard together.
-
Group up to three of these packs, still in order, and wrap them in foam or bubble wrap, held closed with one band round the wrap, not the cards.
- No tape, pull tabs or sticky notes on sleeves or holders. PSA and ACE both ask for this: tape and tabs can catch or mark a card as it comes out.
One stack instead? PSA and CGC describe the holders stacked in order between a single pair of cardboard pieces, held with rubber bands. If your grader asks for that, follow its current instructions.
Sending to ACE? ACE asks that elastic bands aren't used to bind cards together, because they can bend the cards. That's why the bands here go on the cardboard, never on the cards or holders: the cardboard takes the pressure. ACE also asks for a sturdy box packed with paper or bubble wrap. Check its current instructions before you post.
Wrapping and shipping
- Wrap the cards in bubble wrap or foam, up to three packs to a sheet, if you haven't already.
-
Use a sturdy cardboard box, not a padded envelope, with room for cushioning on every side. Fill the gaps so the cards can't move, without crushing them.
Boxed for posting. The wrapped cards sit in the middle with cushioning all round, so nothing moves. - Add the paperwork inside: PSA asks for a printout of the order confirmation, CGC the packing slip.
- Label the outside as your grader asks. PSA has a Submission ID label, and ACE asks for its barcode on the outside of the box. Seal every seam with strong packing tape.
- Post it tracked and insured for its value. ACE recommends Royal Mail Special Delivery. Before you post, check the service's compensation limit and whether trading cards are covered: limits and exclusions vary between carriers and levels of cover.
- Keep your records: the submission number, the tracking number and your photographs.
Common mistakes to avoid
- Forcing a card into a sleeve or holder that's too tight.
- The wrong holder: a toploader where your grader asks for semi-rigids, or a holder that's too small.
- Tape, pull tabs or sticky notes on sleeves or holders.
- Rubber bands pulled tight, or straight round the cards with no cardboard.
- Room to move in the box, or a padded envelope instead of a box.
- Missing paperwork, or a label on the outside that doesn't match your submission.
- Assuming every grader is the same. Check the one you're using.
Using the Shield Grading Submission Kit
Your Shield Grading Submission Kit arrives in its own submission box, inside a protective mailbag. Keep the box: it's for posting your cards to the grader. Its size depends on how many cards your kit is for.
For each card
- 1 premium soft card sleeve
- 1 semi-rigid holder, 84 × 124mm
- 2 cardboard protection inserts
- 2 rubber bands
For your submission
- The submission box, sized for your kit
- Protective foam wrap, 1 sheet per 3 cards
- Extra rubber bands for bundling
- 1 writable submission / address label
You'll also need: your grader's paperwork and any label it provides, packing tape, the postage, and some extra cushioning if there's space left in the box.
- Unpack and check the box. Remove the mailbag, open the box and take everything out. Check the box is undamaged before you reuse it.
- Create your submission on your grader's website and read its packing instructions (see Before you begin). They come first if they differ from these steps.
-
Sleeve each card, then slide it into a semi-rigid holder, one card per holder (see Handling and sleeving).
-
Add the cardboard inserts and bands. The inserts spread the bands' pressure so it doesn't fall on the card. Put each holder between its own two inserts, then loop a band round the inserts near each end: snug, not tight. Sending to ACE? It asks that bands aren't used to bind cards together, which is why they go on the inserts, never on the card.
-
Keep everything in submission order, card 1 on top, all facing the same way.
-
Wrap in foam: put up to three card packs together on one sheet, wrap it round them, and hold it closed with one of the extra bands round the foam, not the cards.
-
Pack the box. Put the wrapped cards back in the box, fill any gaps so nothing can move, and add your grader's paperwork.
- Seal and label. Tape the box closed. Use the writable label for the delivery address or your submission number if your grader doesn't supply its own, and keep your postage label clear of it.
- Post it tracked, with cover for its value. Check the box's postage size and the service's compensation limit with your carrier, then keep your tracking number.
Optional extras. You don't need any of them to follow these steps. Check the product page for what's currently offered.
- Protective submission mailer: an outer mailbag for your submission box when you post it, like the one your kit arrived in, for additional protection against rain and moisture. It doesn't replace the box, and you don't need it to use the kit.
- Extra foam wrap: more cushioning, for example if there's still space in the box.
- Pre-printed submission label: instead of writing on the included label, upload your completed label when you order and we print it.
- Microfibre cloth: for dust on holders and your work surface, never for wiping or polishing the card itself.
Final checklist
- Submission created and grader's packing instructions read
- Every card photographed, front and back
- Each card in a clean, clear sleeve, then its own semi-rigid holder
- No tape, pull tabs or sticky notes on any sleeve or holder
- Holders in submission order, all facing the same way
- Each holder between two pieces of cardboard, bands snug and on the cardboard
- Up to three packs per wrap, boxed with nothing able to move
- Paperwork inside, labels outside, every seam taped
- Posted tracked and insured; submission and tracking numbers saved
Download the printable checklist (PDF, A4). It has room to note your submission details. Sending more than five cards? Add the continuation sheet (PDF).